Design and building budget

Pricing Your Design Project

Budget and pricing are often two of the biggest concerns people have when starting a building project.  This has been heightened by a lot of news about the rapid escalation of material and labour costs in the building industry.

How do you price your project?

There are a couple of different ways to price a project for construction. The most common methods used for a residential project are a competitive tender or a negotiated offer.

Competitive Tender:

Generally, a competitive tender will include pricing from three or four Builders. They are each issued a full set of documentation and have a window of time to price the project.  This does depend on the size and complexity of the project, but a tender period is usually around four weeks. To help ensure pricing is accurate, during the tender period your Architect or Designer will assist the builders.  They will answer queries, issue additional information, and organise for the builders to visit the site.

At the end of the tender period, your Architect or Designer will present you with each of the tenders.  They will discuss each option with you and give their assessment of the pricing.  But it is your decision who you will engage.

If all the pricing comes in high, you can discuss the project further with your preferred builder.  This is an opportunity to discuss buildability, scope reduction and other potential savings so that everyone is satisfied with the scope and budget before signing contracts.

At the core of the tender process is a spirit of fairness. All the tenderers should have access to the same information and be assessed equally.  The other tenderers should be informed if you or your designer has worked with one of the builders before, or if one of the builders has prior knowledge of the project.

A tender should never be used as a ‘test price’ process or a way to check on the pricing of a preferred builder. The builders involved in a tender invest a substantial amount of time pricing your project.  It is not fair to expect this to be done if you know ahead of time that you have no intention of going ahead with them. If you want to check construction costs at any stage of the project, you should engage a Quantity Surveyor to provide a detailed pricing.

If you are thinking of going through a tender process we highly recommend having the project priced by a qualified Quantity Surveyor at least once in the early stages.  This ensures that the scope and design are on track and you go to tender with a reasonable sense of what the construction price will be.

Negotiated Offer:

A negotiated offer is the process of negotiating the price with a preferred builder rather than calling for tenders. It is a more open, collaborative relationship and saves the time spent completing the tender process. The builder can be brought onto the project earlier to offer opinion on buildability and pricing.  A builder with a better understanding of the project can provide a more thorough pricing. Knowing about the project early also helps your Architect or Designer to manage the design timeline alongside the builder’s availability to start on site.

A Negotiated Offer is done in good faith that the project will go ahead with the preferred builder.  Unlike a tender, it is not a competitive process. It requires a higher level of trust and an established positive relationship with the builder to ensure the project is priced fairly. Again, you should engage a Quantity Surveyor at any stage of the project if you would like a second opinion.

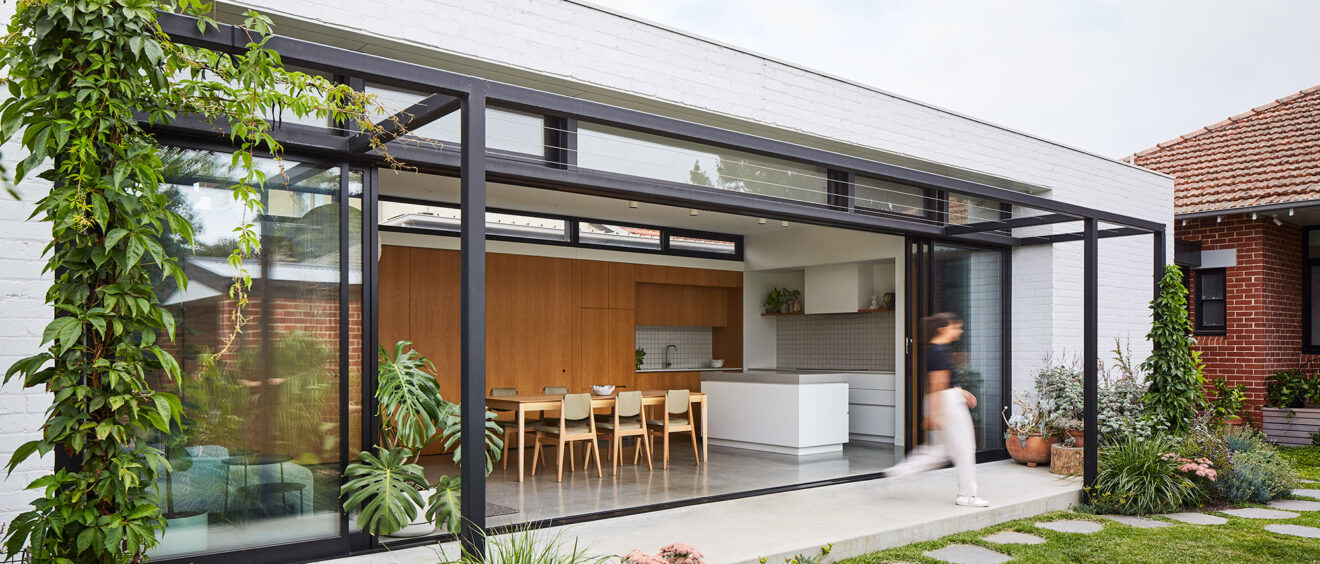
Maike Design kitchen and dining room. Open timber shelves, indoor plants, brass pendant light, teracotta tiles, timber floors.

Case Study:

We successfully used the process of a Negotiated Offer to price our Meow House. We had been referred to our Meow House client by one of our other very happy clients from a previous project. During our early discussions, our client decided that they would also like to bring on the builder from this previous project. We knew that we worked well with this builder, his work was of a high standard. He had been fair and transparent in his pricing in the past, so we were happy to work through a negotiated offer process with him.

The Meow House house included fully gutting and renovating an existing 1960s brick house. The footprint of the house was large but very poorly planned, as a warren of small rooms. Our new design sat within the existing footprint, without an extension.  This meant the careful treatment of the old building was critical to the success of the project.

Once the Sketch Design phase was completed, we had the outline of the design and scope of the project.  We organised a walk-through with the builder to discuss the design and the extent of repairs required.  The builder was able to review buildability and give an indicative price for repair work – giving us a baseline for our budget. Having this baseline cost showed us how much of the budget would need to be allocated to  non-negotiable  items. This wasn’t a matter of expensive finishes or design details.  This was work that the building required to bring it up to a suitable standard.

We continued to check in with the builder as the design and detailing developed.  We worked with them to price some stand-alone elements, like the joinery, ahead of the main pricing. This helped us to keep tabs on pricing and give our client a sense of where the construction price was going to end up.

There is a place for both types of pricing and we hope being aware of your options will allow you to choose the best way to proceed for your project.


We love hearing about your projects no matter what stage you’re at.

If you’ve just started out thinking about your new home have a look at our free 4-week guide – How to: Defining Your Design Brief.

How to Manage Design Decisions

Everyday life is already filled with a seemingly never-ending series of decisions. Some of these decisions are big and many you will barely notice you are making. Cornell University research estimated that the average adult makes around 35,000 decisions every day! On top of all these, the process of designing a home is packed full of even more decisions.

Decision fatigue refers to the sense of overwhelm people feel when they are required to make too many decisions. According to one study, the decisions you make during the day draw on a single reserve of mental energy. This includes all decisions, whether they are less important or particularly weighty. As people become more fatigued, decisions are harder to make. You can read more here and here.

At Maike Design, we use a clear process to that breaks decisions into manageable groups. Each of our stages focusses on finalising specific elements of the design in a carefully ordered progression.

The initial stages of our process set the foundation of the design. We respond to existing conditions of the site, neighbourhood, and original building. The overarching approach sets the conceptual intention of the design, the layout of the plan and is the baseline of the design direction for the entire project. Working through our process, the decisions become more detailed until we have a fully fleshed out design – documented and ready for construction.

By staging the process in this way, each decision sits in the context of the ones prior. While there is an overwhelming array of choices for every element of a design, ours are narrowed down to those that fit within the framework we have already put in place. Using our design knowledge and expertise, we curate these to present the best two or three options. And just like that, the choice becomes easily manageable.

Here are a few ways you can minimise overwhelm and impact of decisions fatigue through your design project:

Work with an Architect or Designer you Trust.

Take their advice on board and voice your thoughts and questions. Understand the theory and reasoning behind the design to help you to feel confident in your choices. Working as a team will result in a considered and individual design.

Consider how involved you want to be.

Before you begin the project, consider how involved you want to be and discuss this with your designer. Be sure to raise it again if at any point your preference changes. Some clients love being heavily involved. Many of our clients work with us because they trust that we will taking care of decisions while keeping them up to date with the key milestones. Delegate decisions to your designer at a level you are comfortable with.

Remember your design is for you, not for everyone else.

As tempting as it is to gather opinions from everyone you know, multiple, differing points of view can make decisions even harder to make. Find someone you trust as a sounding board – but don’t forget to discuss your ideas and priorities with your designer so they can respond to them through the design process.

Give yourself time.

When you have a review meeting with your designer, create some space around the timeslot so you can go into your meeting with a clear mind. After the meeting, put aside time to absorb the information. This should be a time when you have the capacity to consider how your design will meet your specific requirements and make your life wonderful.

Design Drawing

Drawing is a key component of our creative design process.  It’s no secret that I have a personal bias towards hand drawing and genuine admiration for people who can (seemingly) effortlessly produce emotive and beautiful design sketches.  In a world full of beautiful renders and digital documentation, its value can sometimes be overlooked. Every designer uses drawings differently, but I don’t think you will find one who simply does not use it at all.

Drawing is more than a means of representation – it is a way to think as well as to communicate.

The process of drawing can be a direct connection to your thought process. Lines follow on from previous lines, they move and shift as the ideas form.  It is a tool for thought, creativity and problem solving.  Pencil lines on paper can capture idiosyncrasies, movement and character without being anywhere close to a fully developed design.  It is an essential way to explore the sense of a building before the shape of the space has been determined.

The point of sketching isn’t to produce the final image on a piece of paper.  It is a process of observing, creating, and exploring.  One of sifting ideas through a process of expression, evaluation, correction, and re-evaluation.  Sketching to develop a design can merge visible physical characteristics of a space with the more ambiguous perceived and sensory feedback.

“Drawing is a process of observation and expression, receiving and giving, at the same time.”
Juhani Pallasma, The Thinking Hand

Clients are often unaware of the volume of drawings produced during the design process.  This mountain of pages are not all clear or legible.  They can be sketchy and scratchy, drawn over and over while working through an idea.  They overlap one another, often including notes and arrows to show circulation, views, sun, air, and sound.  Through repetition and exploration these design gestures begin to solidify and become ready to be transferred to the finite and precise medium of digital representation.  They are the drafts that gather thoughts in progress, not a finalised idea that will be presented.

Although the early design drawings are one of my favourite stages in any design project, as well as a tool for developing conceptual ideas, we use drawing in different ways throughout the design process:

Site analysis and recording existing conditions:

Diagrams and sketches are a great way of capturing information on site.  They can be overlayed to see how all aspects of a site interact.

Space planning:

Using loose area sketches or bubble diagrams can explore how different areas of use, spatial relationships and occupation sit together.  A space planning sketch is an illustration of design attributes rather than of form and can quickly show areas that are successful or unsuccessful when laying out areas.

Details on the go:

Even on site we use drawings to communicate and discuss details.  It is a succinct way to problem solve and make sure that everyone clearly understands the solution.


By no means am I minimising the value of digital techniques as a communication tool or underestimating the huge gains in efficiency and precision that computer generated design tools have provided. There is a place for both in a robust and thorough process.  A design needs to be allowed to move through its vague and creative stage before it is ready for digital evaluation and production.

…But I will always love a beautiful hand drawn design sketch.

Designing to Age in Place

There are stages in life that prompt you to re-assess the requirements you have for your home.

I have found that the ones we plan for tend to be the exciting, building stages. Milestones like starting a family or the changing needs of teenagers. One that doesn’t seem front of mind for many people is the final stage of your relationship with your home – Aging in Place.

Thinking about your old age and what that will mean for your lifestyle and independence can be confronting.

The World Health Organisation notes reduced quality of life through loss of independence as one of the stressors that leads to isolation, loneliness, or psychological distress in older adults.

A study by the Economic and Social Research Council in the UK found that quality of life in old age is driven by psychological, social and health factors rather than objective indicators like income level, education or social class. As a result of survey responses and qualitative interviews during the study, two other factors were added as quality-of-life indicators– “adequate income and retaining independence and control over one’s life.”

The number of Australian households over the age of 55 grew by almost 3 million between 2006 and 2016. A 2019 study by the Australian Housing and Urban Research Institute showed that between 78 and 81 per cent of Australians aged over 55 (depending on age cohort) want to live in their own home as they age. While the size and type of home are important, the critical factors for this preference were security and having control over the space in which they live. Like any other time in life, we want to live somewhere that feels like home.

If you do choose to remain living at home, there are many ways that a carefully considered design can assist. Even the smallest retrofit can have a huge impact.  From preventing falls to designing beautiful welcoming spaces to help address social isolation, there is a place for architecture and design in the discussion about aging.

Changes that come with Aging.

Our capabilities change as we get older. Some of these are changes in general mobility and dexterity, reduced vision, changes in memory and reduced hearing.  A purpose-built design can integrate the changes in a subtle way to create a functional home that supports changing needs.

These changes will happen in some form to everyone as they age and can be addressed through the design of your home. I am a firm believer in the positive contribution that good design has on day-to-day life. Your home environment has a huge impact on your mood and how you operate. As you age, it will also affect how you can maintain or improve your quality of life.

Below are a few examples of how these changes can be addressed:

Keep things flat.

Minimise or remove any steps in the design to help general mobility and feeling steady on your feet. If they are necessary, ensure that the front edge of the step is clearly visible and there are handrails for support.

Highlight surface changes.

Use contrasting colours to show any change in floor surface. Different surface types have different grip levels underfoot. Knowing where there is a change in surface allows you to steady yourself as you walk across it.

Give yourself space.

When planning your space, include wide doorways so a walking frame can easily fit through. A clear zone on either side of a door allows you to stand still with a walking frame or walking stick while opening and closing the door.

Make sure you also allow plenty of space around beds, dressers, and wardrobes.  These areas may need to accommodate assistive devices like walking frames.

Grab rails.

Install grab rails in bathrooms to reduce the risk of slipping. If you don’t need them just yet, having the structure in the walls ahead of time makes installation down the track easy. Installing a towel rail that can support your weight is a great place to start.  It may be the first thing you reach for if you become unsteady.

Get strategic with your lighting.

Correct lighting levels are critical to a safe home environment. To reduce the probability of tripping, plan your lighting so you don’t ever have to walk through a dark room. This is as simple as installing two- or three-way switches in any room with multiple doorways and light switches next to the bed.

Avoid Reaching.

This goes for reaching up and down.  Avoid high cupboards or shelving that require reaching above your head to get things down.  Lift power points 45cm-60cm from the floor to minimise how far you bend down to use them.  Appliances like dishwasers and ovens can be placed higher than the usual below bench location and washing machines can be placed securely on plinths, all of which minimise having to carry or lift items while bending down.


These points just a few areas to think about when planning a home to Age in Place. There are many more ways to customise your home and a lot more detail involved in designing assist independent living. But I do hope that this brief introduction has been helpful to you or someone you know.

Design and building budget

Case Study 04: The Budget

Budget and pricing are often one of the biggest concerns people have when starting a building project.

How do you price your project?

There are a couple of different ways to price a project for construction. The most common methods used for a residential project are a competitive tender or a negotiated offer.

TENDER:

Generally, a competitive tender will include pricing from three or four Builders. They are each issued a full set of documentation and have a window of time to price the project.  This does depend on the size and complexity of the project, but a tender period is usually around four weeks. To help ensure pricing is accurate, during the tender period your Architect or Designer will assist the builders.  They will answer queries, issue additional information, and organise for the builders to visit the site.

At the end of the tender period, your Architect or Designer will present you with each of the tenders.  They will discuss each option with you and give their assessment of the pricing.  But it is your decision who you will engage.

If all the pricing comes in high, you can discuss the project further with your preferred builder.  This is an opportunity to discuss buildability, scope reduction and other potential savings so that everyone is satisfied with the scope and budget before signing contracts.

At the core of the tender process is a spirit of fairness. All the tenderers should have access to the same information and be assessed equally.  The other tenderers should be informed if you or your designer has worked with one of the builders before, or if one of the builders has prior knowledge of the project.

A tender should never be used as a ‘test price’ process or a way to check on the pricing of a preferred builder. The builders involved in a tender invest a substantial amount of time pricing your project.  It is not fair to expect this to be done if you know ahead of time that you have no intention of going ahead with them. If you want to check construction costs at any stage of the project, you should engage a Quantity Surveyor to provide a detailed pricing.

If you are thinking of going through a tender process we highly recommend having the project priced by a qualified Quantity Surveyor at least once in the early stages.  This ensures that the scope and design are on track and you go to tender with a reasonable sense of what the construction price will be.

NEGOTIATED OFFER:

A negotiated offer is the process of negotiating the price with a preferred builder rather than calling for tenders. It is a more open, collaborative relationship and saves the time spent completing the tender process. The builder can be brought onto the project earlier to offer opinion on buildability and pricing.  A builder with a better understanding of the project can provide a more thorough pricing. Knowing about the project early also helps your Architect or Designer to manage the design timeline alongside the builder’s availability to start on site.

A Negotiated Offer is done in good faith that the project will go ahead with the preferred builder.  Unlike a tender, it is not a competitive process. It requires a higher level of trust and an established positive relationship with the builder to ensure the project is priced fairly. Again, you should engage a Quantity Surveyor at any stage of the project if you would like a second opinion.

CASE STUDY:

We successfully used the process of a Negotiated Offer to price our Meow House. We had been referred to our Meow House client by one of our other very happy clients from a previous project. During our early discussions, our client decided that they would also like to bring on the builder from this previous project. We knew that we worked well with this builder, his work was of a high standard. He had been fair and transparent in his pricing in the past, so we were happy to work through a negotiated offer process with him.

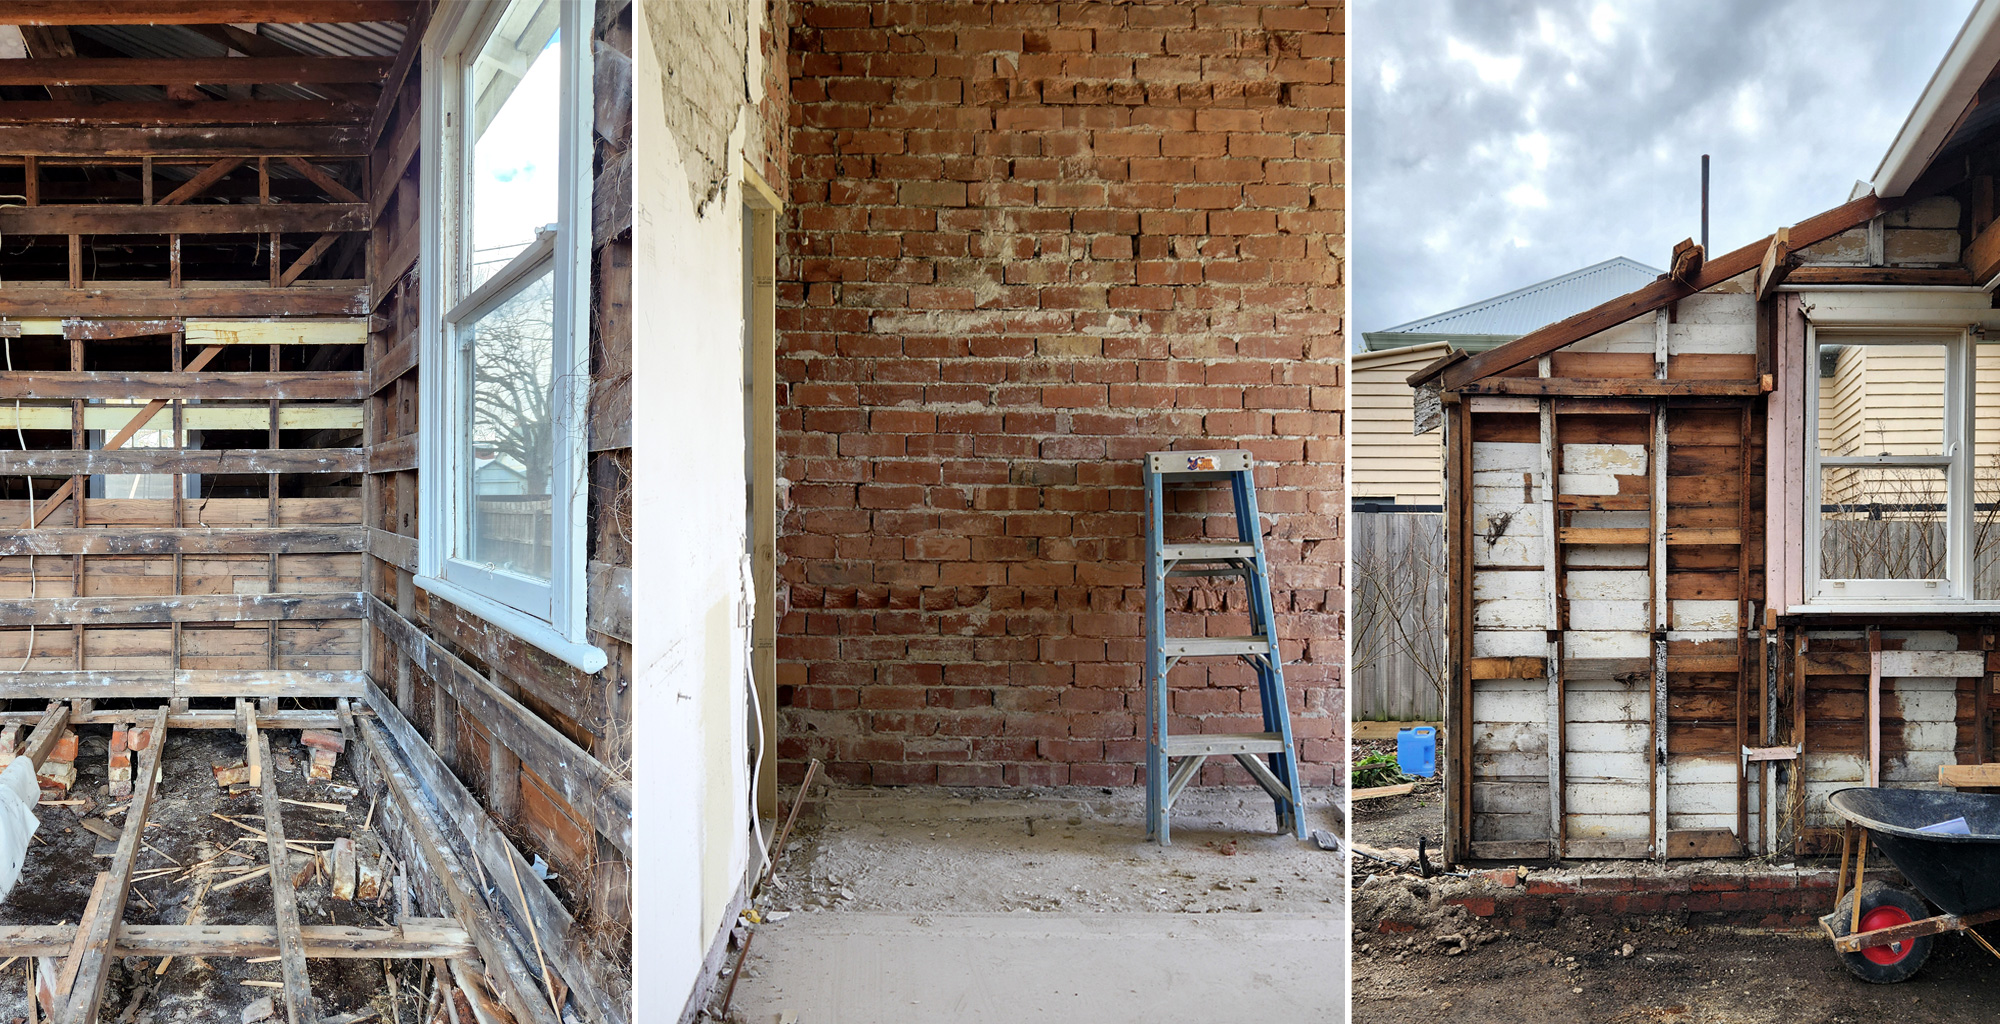
The Meow House house included fully gutting and renovating an existing 1960s brick house. The footprint of the house was large but very poorly planned, as a warren of small rooms. Our new design sat within the existing footprint, without an extension.  This meant the careful treatment of the old building was critical to the success of the project.

Once the Sketch Design phase was completed, we had the outline of the design and scope of the project.  We organised a walk-through with the builder to discuss the design and the extent of repairs required.  The builder was able to review buildability and give an indicative price for repair work – giving us a baseline for our budget. Having this baseline cost showed us how much of the budget would need to be allocated to  non-negotiable  items. This wasn’t a matter of expensive finishes or design details.  This was work that the building required to bring it up to a suitable standard.

We continued to check in with the builder as the design and detailing developed.  We worked with them to price some stand-alone elements, like the joinery, ahead of the main pricing. This helped us to keep tabs on pricing and give our client a sense of where the construction price was going to end up.

There is a place for both types of pricing and we hope being aware of your options will allow you to choose the best way to proceed for your project.


We love hearing about your projects no matter what stage you’re at.

If you’d like to have a chat about your project you can book in a free phone or video chat with Mairead.

If you’ve just started out thinking about your new home have a look at our free 4-week guide – How to: Defining Your Design Brief.

Case Study 02: The Unique Details

Building or renovating a home is your chance to make something that is unique.

Creating a home is beyond just providing shelter. Architecturally, a space is a house – a container. It is the act of living in the space that creates a home. A dwelling (noun) collects us together with our loved ones but is nothing without the act of dwelling (verb) within it to animate and fill its spaces.

Your home is where you can take details or rituals, that on one hand may seem mundane or trivial and elevate them to be a delightful, functional part of your life. It could be as simple as – the first thing you do every morning is turn on some music and put the kettle on.  This gives us a starting point to plan your kitchen.  We would provide a space and power for a speaker and easy access to the kettle or boiling water tap as you enter the room.  The kitchen would be designed with plenty of morning light or a beautiful glimpse of the garden for you to look at while you drink your tea. When thoughtfully designed, this becomes an enjoyable and effortless daily ritual. When it is not considered, you are setting yourself up with an annoying start to your day.

At the start of our process when we put together a design brief, we discuss these details with clients.  This allows us to make sure that each of our projects is an individual response to their needs.

CASE STUDY 1:

Our Meow House clients included a couple, one soon to be teenager and two indoor cats.

One partner was a shift worker who often leaves for work early.  In our early space planning stage we reviewed the use of the rooms at different times of the day.  This lead us to a floorplan where our shift worker can get ready for work at any time of day or night, without occupying any rooms next to their son’s bedroom.

The two indoor cats are much loved family members.  The design gave them places to climb and relax even without access to outside. A kitchen incorporated a custom joinery cupboard with cat-sized cut outs in the doors.  Inside housed a climbing frame up to a shelf the full length of highlight windows. This gave them a high spot to sun themselves and keep an eye on the back yard.

Being indoor cats, we considered how to contain them if the doors to the back terrace are open.  We installed a large glass pivot door in the hallway to keep the cats safely in the front of the house, with access to everything they need.

CASE STUDY 2:

The Garden House is a family home for a couple and two teenagers.

One of our clients is a keen cyclist so we incorporated the original, heritage shed façade into a new workshop to store and repair bikes. The new building sits opposite the kitchen, dining and living room extension.  It includes an enclosed workshop and a large, under-cover area.  The undercover area is connected to the backyard by two oversized sliding doors. When open, the space becomes part of the back yard and gives the workshop a strong connection to the rest of the family.

The enclosed workshop picks up on the style of the original house and the heritage brick façade. During the demolition stage of the project we saved bricks, a window and the back door from the house. These were repaired and reused in the workshop. These material choices allow the workshop to sit comfortably alongside the modern extension of the house as if it had always been there.


We love hearing about your projects no matter what stage you’re at.

If you’d like to have a chat about your project you can book in a free phone or video chat with Mairead.

If you’ve just started out thinking about your new home have a look at our free 4-week guide – How to: Defining Your Design Brief.

Case Study 03: The Big Questions

Designing and building your dream home is a long process and at times a tough one. Along the way you may question why you’re even doing it and what you’re hoping to achieve. At times like this, having the answers to these big questions will help you to stay focussed on the end goal of living happily in your home.

Some big questions you might want to ask are:

What value does our new home give us as a family?

What has motivated our decision to create a bespoke family home?

What am I worried about / looking forward to?

When I’m in my new home, how will it make me feel?

It is important to discuss these goals with everyone who will be making decisions. If you are building with a partner, do you know if you have different ideas of what will make the project a success? If so, you will be approaching each element of the design with a different criterion.  Understanding these criteria will allow you discuss the design with empathy for other perspectives.  This will also allow you to understand where you each may be able to compromise to accommodate the other.

CASE STUDY 1:

We used the technique of ‘100 sentences’ to answer the big question of what we value as a design practice. The goal is to be able to write down 100 sentences that answer your question.

Using one of the examples above – “Our new home will bring us value by…”

or in our case, “At Maike Design we strive to…”

You can read the full outline of the method and where we ended up here.

CASE STUDY 2:

Our Next Door House 2 is a small footprint house for a family of 4. The original weatherboard house was built in the late 1940s. It was dilapidated and dark with minimal connection to the exterior.  The block sloped sharply along the length of the house down to a completely concreted yard.

The brief was to keep the footprint of the house at 90 square meters to maintain as much of the backyard as possible. With space at a premium and two small children, decisions had to be made about what was important to the family.

Going into the project we ensured everyone had a clear sense of what would make this home a success.  In this case, it was to create a unique, beautifully detailed and functional family home in a small footprint that would be a joy to live in.

To take on this delightful but quite abstract goal, we identified physical attributes that our design would need to address:

– Maintain the house size and provide convertible, functional space to adapt to growing children.

– Create a sense of calm throughout the interiors.

– Accentuate the limited connection to the exterior and natural light wherever possible.

– Upgrade the original building to a high standard to ensure a comfortable and efficient house.

This understanding enabled us to approach the design pragmatically. Throughout the process, keeping these goals in focus made decision making easier.  The finished project aligned with the brief criteria to create a beautiful home, suited to the family now and into the future.


We love hearing about your projects no matter what stage you’re at.

If you’d like to have a chat about your project you can book in a free phone or video chat with Mairead.

If you’ve just started out thinking about your new home have a look at our free 4-week guide – How to: Clearly Define Your Design Brief.

What does a design business need?

The full review of my business and process had been in the back of my mind for quite a while.  I’m sure I’m not the only person who has plenty of good intention but no real way to direct them into something productive.  I’d listen to some podcasts, make notes in my ‘Business Development’ notebook, maybe do a recommended exercise or two and then get busy …so I would put aside the plans and the notebook for another few months.

I thought I’d quickly catch up you on a three main areas that I had been considering as a way to get clear on what my starting point was.

These are ideas I knew would be part of my overall direction but I had decided on each in isolation, without any overall strategy for implementation.  I’ll write about them all separately to go into each of them in more detail as I work through them.

The first is my general process.  Since starting Maike Design I have been tweaking each project and how it is presented to clients.  I arrived at the current general outline of my process through roughly testing what worked and what didn’t.  I originally started with the same main phases of Concept Design, Design Development etc that we are all taught, but quickly realised how big these stages are and how much each of them contains.   I now have a set of stages and sub-stages that I am generally happy with.  During my review so far I have started to look at what outcomes I need for each stage to successfully lead into the next and then designing the process from my clients’ point of view – what will they need from me to ensure that the project is as enjoyable as possible and to feel like that stage of work has been successfully completed.  My goal is to fully review and thoroughly document my process.

As a way to get myself moving, at the start of this year I did the Myers Briggs and NEO-PIR tests.  I know that not everyone is convinced about the validity of being able to sort personalities into easily definable traits, but for me it was a great way to reflect on my strengths and weaknesses.  It started me thinking about what parts of the practice I want to be responsible for and what I am not best suited for.  (In the interest of making this an open discussion…I was an INFJ and in the NEO-PIR test scored relatively evenly apart from creativity and organisation, apparently an unusual combination, where I was right at the top of the chart).

The results led me to my second idea: automate as many repetitive non-creative tasks as possible to allow for the maximum amount of time to concentrate on the design aspects of my projects – so combine high levels of organization with high levels of creativity.  I also hope it will allow me to be more productive and to scale the business when I’m ready.   Already I am a pretty organised person, I love a good filing structure and have a system of to-do lists that make me feel calm and happy inside.  But I found that for every project I would pull bits and pieces from past templates, start files from scratch and spend time working out or tweaking things that I could have already worked out once, if I’d taken the time.  My goal is to not make any technical decision more than once unless it is in the context of a future process review.  I don’t just mean a set of practice standards or letterheads, I mean everything I can possibly capture ahead of time in presentations, notes in schedules, drawings standards and administration tasks.  I want to be able to dedicate as much brain space to producing creative and thoughtful designs as humanly possible.  That and my inner organiser is happily rubbing her hand together at the thought of all the systems and templates I am going to have to implement to make this idea work.

Finally, the third is to approach each project as a chance to exchange ideas and make sure this is key part of my process.  One mistake I made when I first began was overestimating how much most people know about the design and construction process.  I hadn’t realised that in some cases their only exposure to a design project is what is shown on reality tv, which is not in fact, reality.  I have decided to build my entire process around providing plentiful and clear information every step of the way, even for the basic stuff that I had previously assumed was known.  I would do everything I can to foster a relationship that encourages questions and where possible pre-empts what they will be.  I believe that the better understanding of the practical and theoretical aspects of design I can pass onto my clients, the more they can be genuinely involved in the project and confidently feel an intellectual and emotional link to the design and the decisions that are being made.  I don’t want my work to seem like a superficial, fashionable response, smoke and mirrors, or an outcome that I magically and perhaps randomly arrive at.

All three of these ideas need to work together as well as being part of a larger brand and business strategy.  So, armed with a full notebook and a mess of other ideas, I have decided to get serious about it.

Hello, let me introduce myself

Hi,

Thanks for visiting.

These posts will be a place to share our design inspiration, current work and updates on how we are developing as a studio.

I didn’t aspire to running a design practice when I first started my career.  I had always imagined myself working in a large, established practice.  I wasn’t a business person, I was a designer – so starting Maike Design wasn’t a well planned or particularly well executed undertaking.

First of all, I’ll step a little further back for a minute… After working in a huge team to deliver a multi billion dollar project, I had just landed a job at my favourite Architecture firm.  My dream job.  I had been wanting to work for this practice since first started studying design.  Their work is amazing and I was a little star struck just being in their offices.  At the same time, I started my Architecture Masters so was working part time and studying full time.  A couple of months in, as a result of the exhausting long hours on the previous project my body just packed in.  My immune system stopped regulating itself, my face swelled up like I’d been stung by a bee and I could barely make it through the day without needing to have a sleep.  It wasn’t great.

I was trying to work out how I was going to balance my health, work and study (and who knows, maybe even have a little bit of time for some life) when the opportunity to do my own project came up.  It seemed to be the answer I was looking for.  I could balance various deadlines without being tied to normal office hours.

And that is how I started.

I was only trying to replace a part time wage while I was studying.  This eased the financial transition but didn’t provide much scope to employ outside help. Like many lean start up practices, I have been doing everything myself while also trying to do the actual project work.  I built a passable template website, designed my own logo, set up all my own documents and have an embarrassingly clumsy excel spreadsheet where I keep track of my profit and loss.

As well as starting financially lean, I started lean on time.  Until now, this has been a part time venture.  Since starting Maike Design I have also finished my Architecture Masters, built and run a shared workspace, renovated (sometimes actually on the tools) two houses for my partner and our family, had two babies and started an Illustration practice.  This is the first time I’ve had the opportunity to stop and examine my business to see what it can do when given some full time attention.

While I still have projects running at various stages I have been making sure I take time to spend with my new little family.  Right now, as I’m writing this our second baby is 4 months old and she’s asleep on a pillow on my lap.

I have decided to use this period as an opportunity to completely renovate my business, examine every part of my process and overhaul my systems and templates.  I’ve always been a very organised person but lately I’ve gone from being not-a-business-person, to an obsessive business podcast consumer, an enthusiastic systems junkie and a hesitant but optimistic planner of future success.

I’ve found that while there is an overwhelming amount of general business information available, there is very little discussion around this aspect of architectural practice beyond the traditionally taught processes.   I don’t think these should be automatically assumed to be the best way of doing things.  For Maike Design Studio I particularly want to create a project process that puts an emphasis on making time for creative exploration, client involvement and communicating the value that thoughtful design decisions can bring to any built outcome.

I’d love to start an open and frank discussion with anyone interested about alternative methods of delivering architectural projects.  Hopefully we can share our ideas of what it takes to set up and maintain a successful design practice.  I hope that by documenting my journey here it might be helpful to someone in their business.

See you again soon!